As mentioned above, in the Provider Administrator portal, you can initiate the FNOL from both the Claims and Policies modules.
Claims module
To initiate the FNOL from the Claims module:
- In the BriteCore menu, select Claims.
- On the Claims List screen, select the New Claim button.
- In the New Claim dialog box, choose one of the following, and then select Done:
- Use System Generated ID
- Manually Create an ID
Note: If the manual ID you create contains more than one section, separate the sections with a dash or underscore. The system won’t recognize an ID that includes spaces.
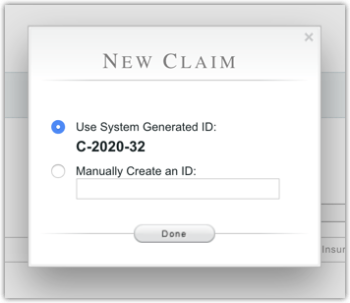
Figure 1: View of the New Claim dialog box. - When you’re finished, select Done.
Note: At this point, the new claim’s status is Uncommitted.
To complete the FNOL, access the Step 1A – Complete FNOL in Provider Administrator portal tab.
Policies module
When initiating the FNOL from the Policies module, remember that you can file claims only on in-force policies.
To initiate the FNOL from the Policies module, select Policies from the BriteCore menu and:
- Search for the policy that the claim will be filed on by typing the policy information in the Search for a Policy box and selecting Search. Policy information can include the Policy ID, the Named Insured, or the Policy Type.
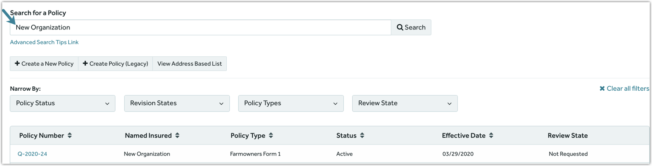
Figure 2: Search criteria typed into the Search for a Policy box and the generated search results. - Select the correct policy from the generated search list. When you select a policy, BriteCore will direct you to the Revisions screen of the policy.
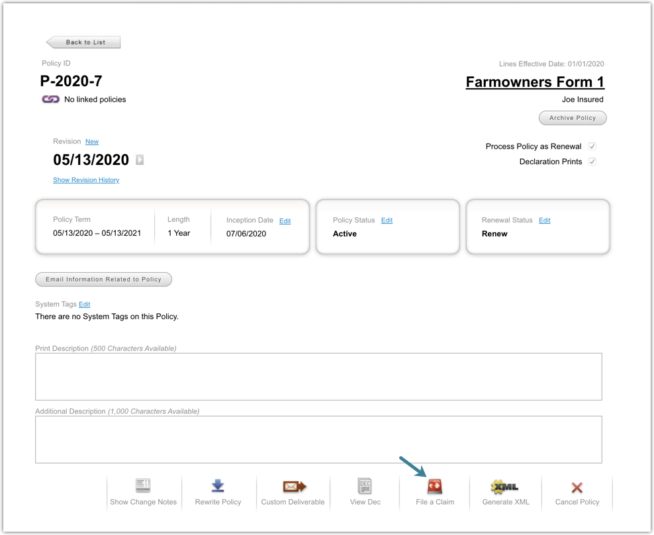
Figure 3: View of the Revisions screen of the policy and the File a Claim icon.
- In the header of the Revisions screen, navigate to and select the File a Claim icon. The Confirm pop-up window will open stating: You’re about to file a claim on this policy. Do you wish to proceed?. Select OK to file the claim. BriteCore will direct you to the header of the new claim, and will automatically pull in the Policy ID and named insured.

Figure 4: View of the header of the new claim with the Policy ID and named insured automatically populated.
- To complete the FNOL, access the Step 1A – Complete FNOL in Provider Administrator portal tab.
Agent portal – first notice of loss
In the Agent portal, you can initiate the FNOL from both the Claims and Policies modules.
Claims module
To initiate the FNOL from the Claims module:
- In the BriteCore menu, select Claims.
- On the Claims screen, select New Claim.
Note: You will be directed to the File a Claim screen. To complete the FNOL, access the Step 1B – Complete FNOL in Agent portal tab.
Policies module
When initiating a FNOL from the Policies module, remember that you can file claims only on in-force policies.
To initiate the FNOL from the Policies module, select Policies from the BriteCore menu and:
-
- Search for a policy that the claim will be filed on, by typing the policy information in the Search for a Policy box and selecting Search. Policy information can include the Policy ID, Named Insured, or Policy Type.
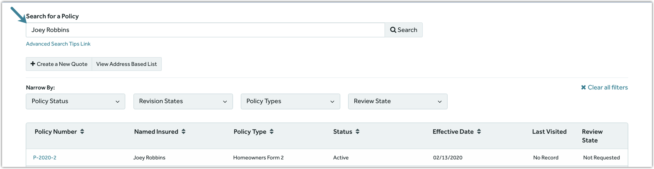
Figure 5: Search criteria typed into the Search for a Policy box and the generated search results. - Select the correct policy from the generated search list. When you select a policy, BriteCore will direct you to the Accounts Receivable screen of the policy.
- Select Policy Setup.
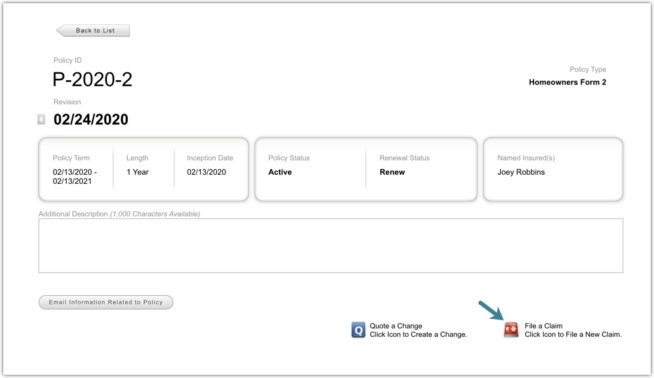
Figure 6: View of the policy header on the Policy Setup screen with the File a Claim icon. - In the policy header, navigate to and select the File a Claim icon. A Confirm pop-up window will open stating, Filing a claim will open a new page. Are you sure you want to leave this page and file a new Claim?. Select Yes to file a new claim.
- BriteCore will direct you to the File a Claim screen, and the policy information will already be pulled in to complete the Policy Number, Policy Status, Term Effective Date, Term Expiration Date, Insureds, and Agency fields.
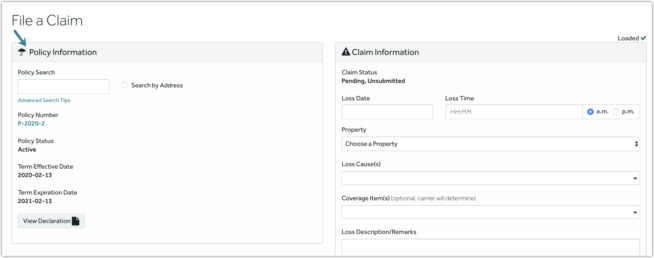
Figure 7: View of the File a Claim screen with the policy information automatically populated. - To complete the FNOL, access the Step 1B – Complete FNOL in Agent portal tab.
- Search for a policy that the claim will be filed on, by typing the policy information in the Search for a Policy box and selecting Search. Policy information can include the Policy ID, Named Insured, or Policy Type.
Step 1A – Complete FNOL in Provider Administrator portal 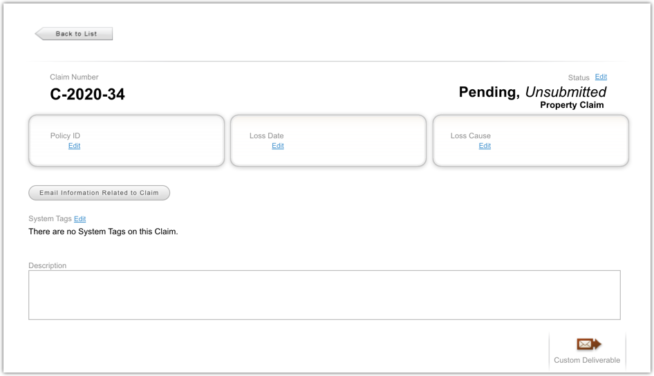
Figure 1: View of the claim file header.
After you initiate the FNOL from the Claims or Policies modules, you can complete the FNOL. To complete the FNOL:
- In the claim file header, select the Edit button under Policy ID. The Policies dialog box will open.
Note: If you initiated the FNOL from the Policies module, BriteCore automatically pulls in the policy information to this section. Move to step 3.
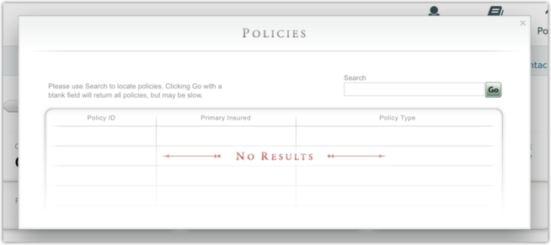
Figure 2: The Policies dialog box. - To locate the policy that the claim will be filed on, type the policy information in the Search box, such as Policy ID, Named Insured, or Policy Type, then select Go. Select the correct policy from the generated search list. When you select a policy, you will automatically return to the claim header.
Note: If you don’t know the policy information, you can select Go with a blank Search box. This will return all policies.
- Select Edit beneath Loss Date. The Loss Date dialog box will open.
Note: You will be able to set a Loss Date outside of the policy term unless the Restrict Loss Date advanced setting is set to True
- Use the Date boxes to type the date of the loss using the MM/DD/YYYY format. Use the Time boxes to type the time of the loss using the HH/MM format. Select the AM or PM radio buttons. When you’re finished, select Done to save the information and return to the claim header.
Note: Depending on the advanced setting, allow-cat-auto-assign and the date and time entered, a Confirm pop-up window may open listing the possible catastrophe(s) that can apply to the claim.

Figure 3: In the Confirm pop-up window, select Yes or No, and then BriteCore will return you to the header. - Select Edit under Loss Cause. The Loss Cause dialog box will open.
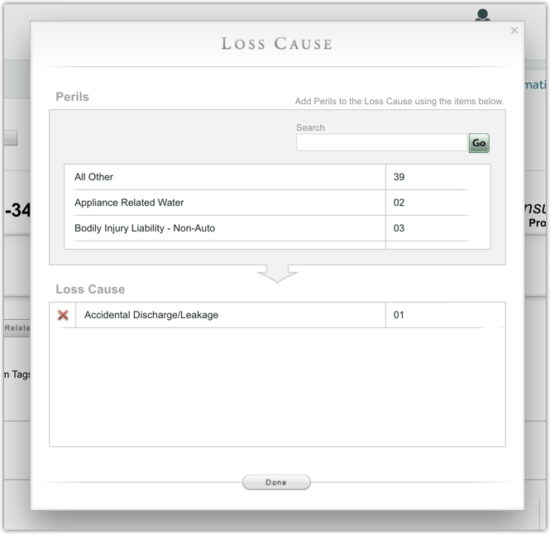
Figure 4: The Loss Cause dialog box displaying selected perils in the Loss Cause section. - In the Perils section, select perils to add to the loss by typing the peril type in the Search box and selecting Go. You can also select directly from the list of perils. When you select a peril, BriteCore automatically moves the peril to the Loss Cause section. When you’re finished, select Done to save the information and return to the claim header.
Note: If you select a peril by accident, use the red X to remove the peril from the Loss Cause list.
- To add system tags, select Edit next to System Tags. The Edit System Tags dialog box will open.
- Select system tags from the list. When you’re finished, select Done to save the information and return to the claim header.
- In the Description box, type a detailed description and summary of the loss.
- Depending on the advanced setting, fnol-like-claim-submission, a Submit button may appear in the claim header beneath Status. Select the Submit button to submit the claim. If the Submit button isn’t displayed, move to the next workflow.
Additional information
Step 1B - FNOL in Agent portal